What Is EPDM?
Important Point
EPDM, known for its epdm rubber roofing cost effectiveness, is an extremely durable synthetic rubber roofing membrane widely used in low-slope buildings in the United States and worldwide. Its two primary ingredients, ethylene and propylene, are derived from oil and natural gas.
What Is EPDM Roofing?
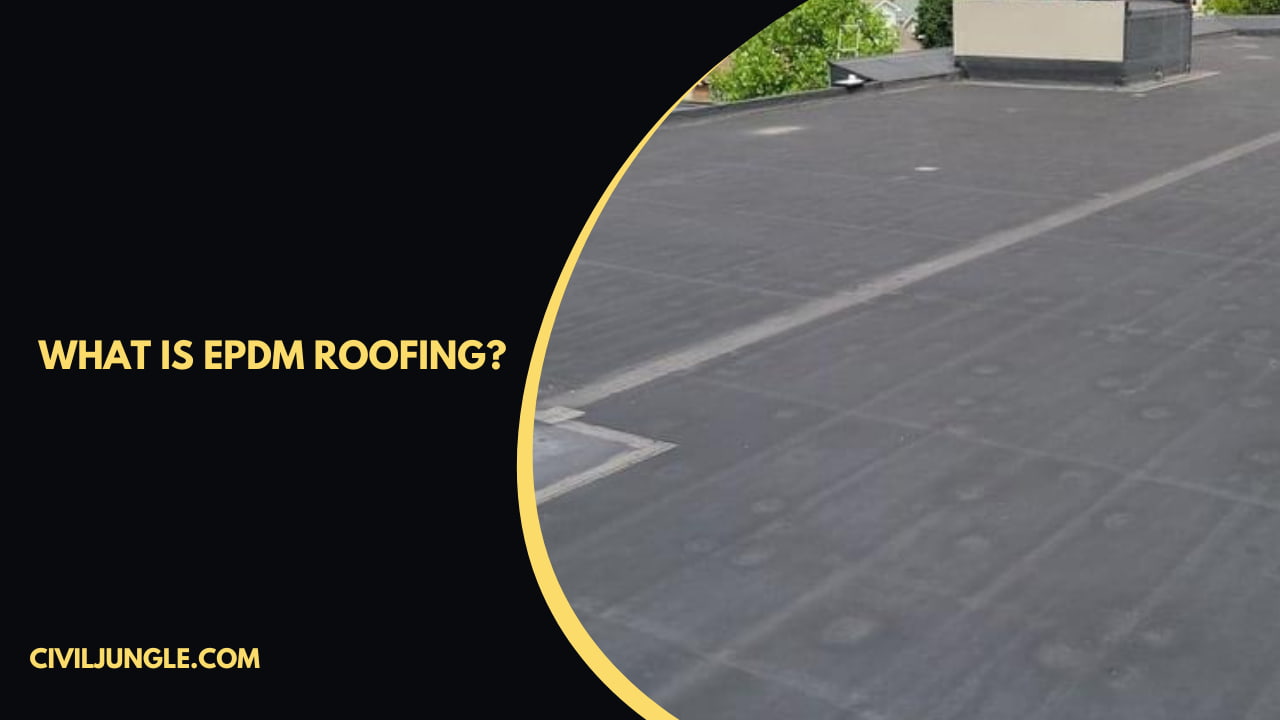
EPDM is a type of roofing material that is used for flat roofing systems. Homeowners may not choose it for aesthetic purposes, but it’s practical and durable, and it will certainly get the job done in terms of protecting your property from the elements. It can be used for both residential and commercial structures that have low slopes.
EPDM flat roofs are designed to last about 25-30 years. They are flexible, lightweight, and have fire resistance to wind, thermal shock, UV radiation, hail, extreme temperatures, and more.
If you are interested in EPDM roofing installation, please feel free to get in touch with our team of experts.
EPDM Flat Roof Installation
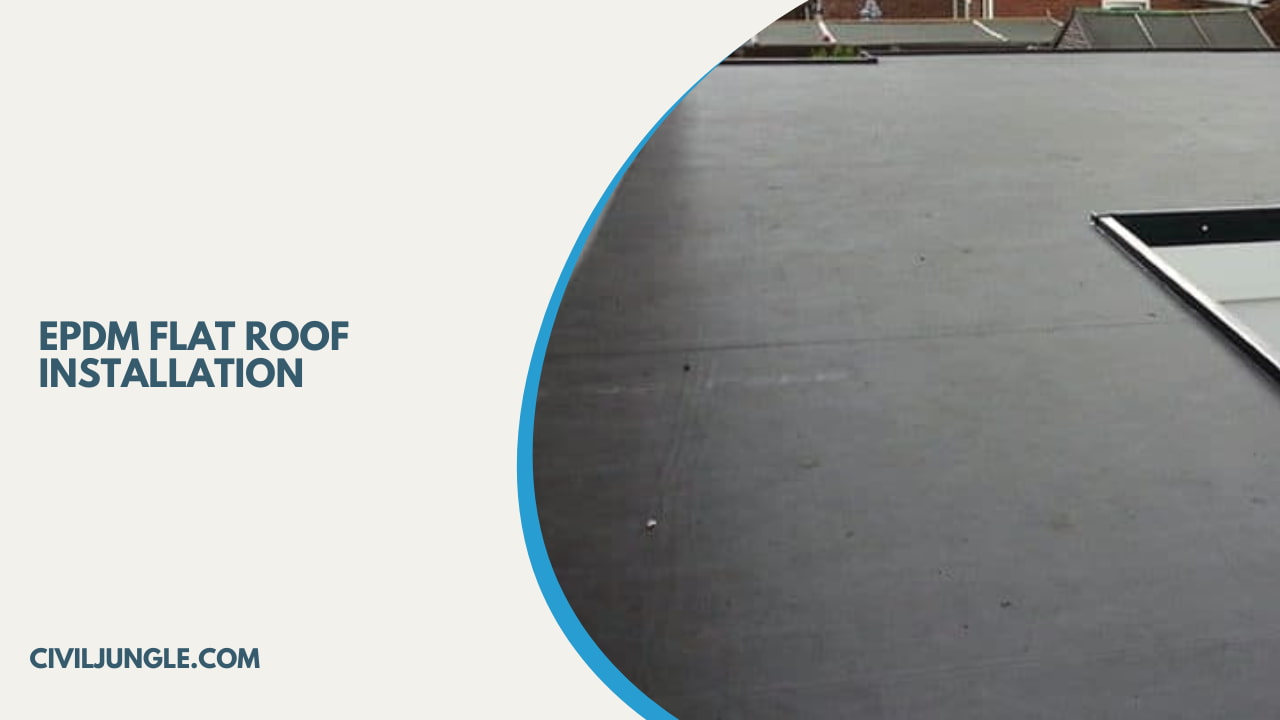
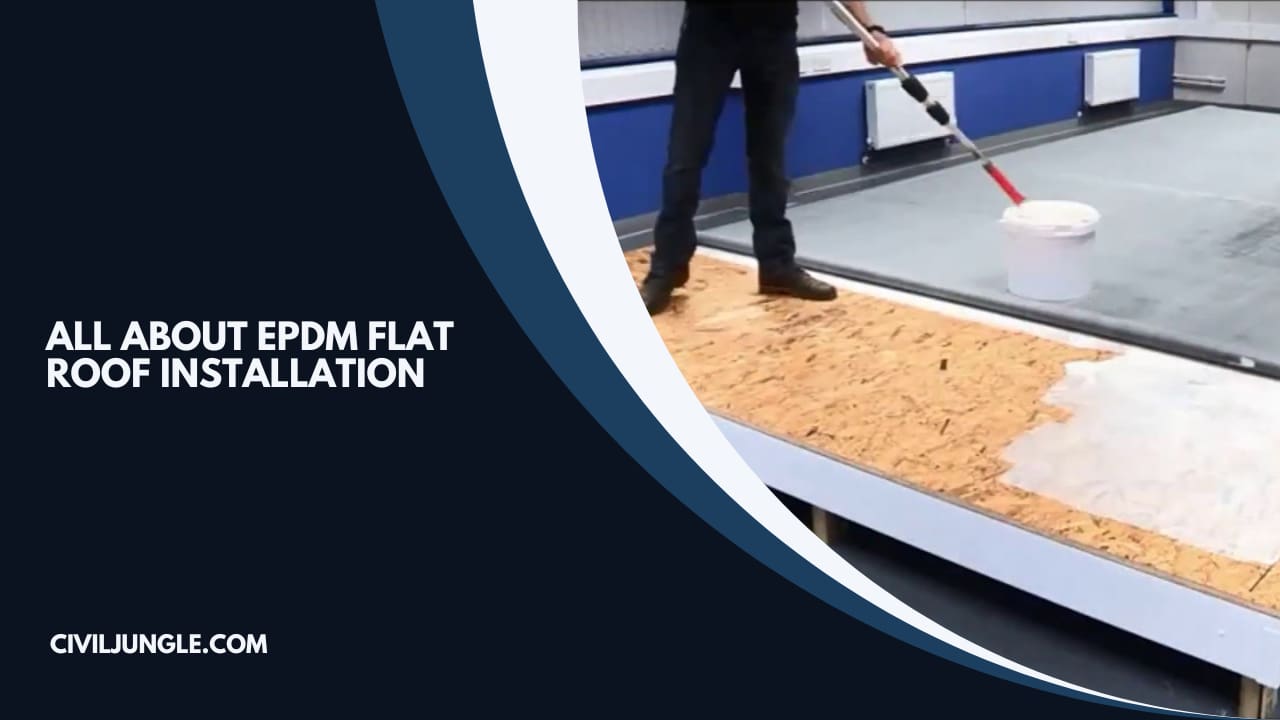
EPDM roofing installation is a very easy process and it is widely used nowadays. EPDM roofing is a type of roofing that is installed with large sheets.
The EPDM roofing process is a type of process which required fewer laborers and it does not require too much-skilled labor.
This type of method is a “fully adhered” method where an adhesive material is used to bond together. The EPDM roofing process is a step-by-step process that provides rubber roofing to protect your flat roof.
Some items that are required to install the EPDM rubber roofing are below,
- EPDM membrane
- Paint roller
- Adhesives (for bonding purposes)
- Utility knife or scissors
- Gloves and eye protection
- Push broom
Cost of EPDM Flat Roof
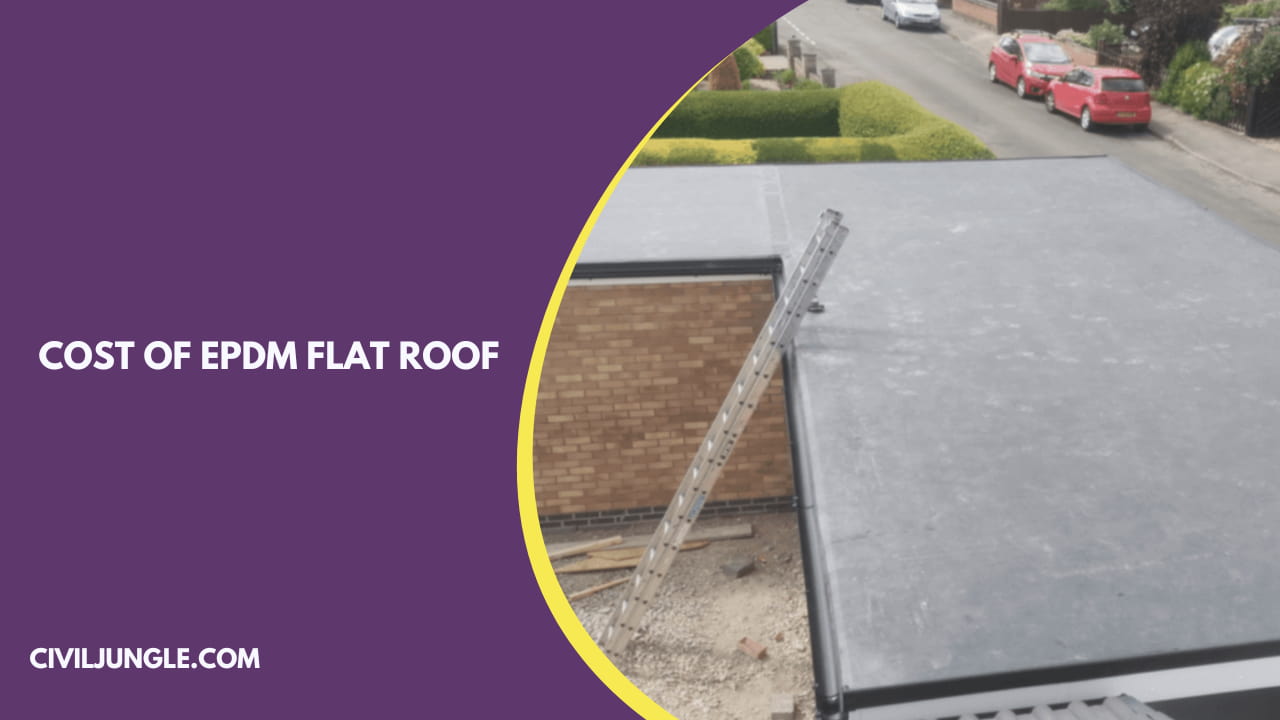
The rubber roofing cost, particularly for epdm roofing cost per square foot, varies from one range to another range because of the availability of raw materials and skilled laborers.
On a typical flat roof, the install cost of an EPDM flat roof is expected to vary from $6.50 to $12.50 per square foot. Or for the low slope roof replacement, it varies from $9750 to $18750 for 1500 square feet.
The flat roof cost also depends on the number of penetrations, the number of layers of insulation, also the existing roof removing cost, and the cost depending on tear-off may be lower or higher.
And Other costs affecting factors are accessibility, overall roof difficulty, and the location of the project. For this above reason, we can say this flat roof system also increases the total cost of the project.
How to Install EPDM Rubber Roofing?
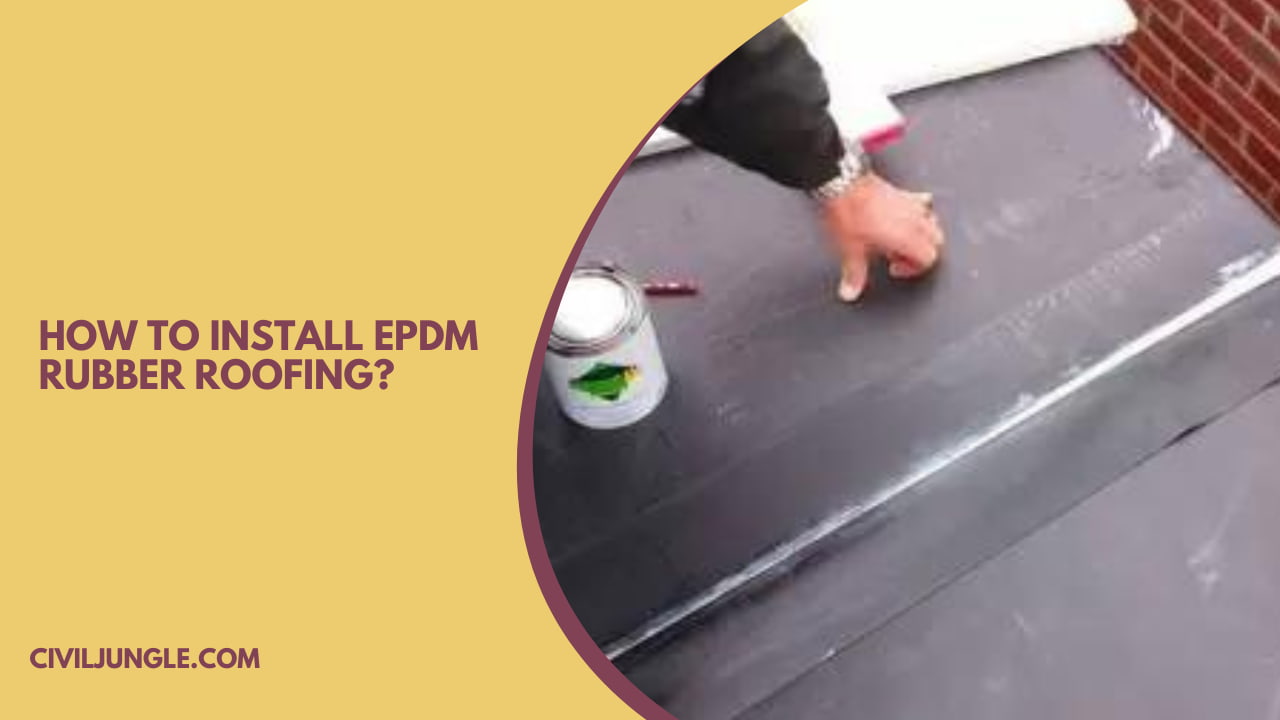
The process of how to install epdm roofing, specifically epdm roof installation, is straightforward and it is widely used nowadays. EPDM rubber roofing is a type of roofing that is installed with large sheets. EPDM rubber roofing process is a step-by-step process that provides rubber roofing to protect your flat roof.
This type of method is a “fully adhered” method where an adhesive material is used to bond together. There are have many steeps and required experience to avoid many mistakes that cause damage to the roof.
The steeps are showing below.
- Prepare the roof deck.
- Add a drip edge and drip batten.
- Install the rubber membrane.
- Apply the finishing touches.
Useful Article For You
- What Is a Contour Interval
- What Is Tile
- What Is the Difference Between a Shower Pan and a Shower Base?
- What Is a Window Panel
- Type of Arch
- What Is the Measurement for a Queen Size Bed
- What Is Considered Livable Space
- What Is One Way You Can Save Electricity?
- What Is a Bundle of Shingles
- What Is a Gallon of Water Weigh
- What Is Sand Blasting
- What Is a Span Bridge
- What Is the Little Black Diamond on a Tape Measure
- What Is a Louvered Door
- What Is a Spread Footing
- What Is Leveling
- Different Types of Beam
- What Is Pedestal
- What Is Plumbing Fixtures
- Soft Floors
- Difference Between Pier and Pile
- What Is Slab Construction
- What Is Calacatta Quartz
- What Is Auxiliary View
- Sheepsfoot Roller
- What Is 1 Flight of Stairs
- What Is Refractory Cement
- Dry Pack Concrete
- What Is Luminous Flux Vs Lumens
- What Is a Frost Wall
- What Is an Undercoat
- What Is Road Pavement
- Arch Foundation
- What Is a Stair Landing
- What Is a Spandrel Beam
- What Is Pier and Beam Foundation
- What Is a Pile Cap
- What Is a Mat Foundation
- What Is a Floating Slab
- What Is the Purpose of Foundation
- What Is a Flush Door
- What Is Residential Construction
- What Is the Best Foundation for a House
- What Is a Benchmark in Surveying
- What Is a Engineering Drawing
- What Is an Admixture
- What Is the Standard Size Water Supply Line
- What Is the Difference Between Tension and Compression?
- What Is a Tremie
- What Is Tributary Area
- What Is Shoring Construction
- What Is a Cason
- What Is Wall Putty
- What Is the Difference Between Mortar and Concrete
- What Is Bhk
- What Is Sbc of Soil
- What Is Plinth Level
- What Is Water Proofing
- What Is Mix Design of Concrete
- What Is Fine Aggregate
- What Is Retention Money
- What Is Design Mix
- What Is Isometric Scale
- What Is Development Length
- What Is Superelevation
- What Is Wall Made Of
- What Is Micro Piling
- What Is Soil Stack
- What Is a Half Wall Called
- What Is Flagstone
- What Is a Cinder Block
- What Is Floors
- What Is a Parapet in Construction
- What Is Concept Drawing
- What Is a 30 Degree Angle
- What Is a Mezzanine Level
- What Is Plinth Area
- What Is Precipitation
- What Is a Soffit
- What Is the Difference Between Residual and Transported Soil
- What Is a Drop Manhole
- What Is Oblique View
- What Is a Flyover Bridge
- What Is Tie Beam
- What Is the Cost of 1 Bag Cement
- What Is Well Foundation
- What Is the Principle of Chain Surveying
- What Is Dlc in Road Construction
- What Are the Advantages of Levelling
- What Is Hardened Concrete
- What Is Plinth Protection
- What Is Wbm Road
- What Is Measurement Book
- What Is Traversing in Surveying
- What Is the Space Between Windows Called
- What Is a Moment Frame
- What Is 53 Grade Cement
- What Is True Slump
- What Is Joisted Masonry Construction
- What Is the Back Azimuth of 180 Degrees
- What Is Stretcher Bond
- What Is Consistency of Cement
- What Is Pointing
- What Is Design Period
- What Is Long Column and Short Column
- What Is the Full Form of Rcc
- What Is Centering in Construction
- What Is Stone Masonry
- What Is M30 Concrete
- What Is Dead Load and Live Load
- What Is Grouting
- What Is Grade Slab
- What Is Dpc
- What Is Lapping Length
- What Is Azimuth in Surveying
- What Is Inverted Beam
- What Is Concealed Beam
- What Is Brick Bat Coba
1. Prepare the Roof Deck
At first, we have to prepare the roof deck by cleaning the deck from the grime or oil and also cleaning any sharp edges of OSB board or plywood from the roof deck.
The adhesive, can lead to a problem with the moisture with a little amount, for this reason at first you should be ensuring that everything is totally dry then you can start the installation process.
If over an existing roof you want to install EPDM then at first you should be cover it with a clean OSB board or sanded plywood to protect the membrane create a barrier and cover it.
For the roof decking if you want directly apply the EPDM then a layer of insulation should be added to prevent the water vapor problems.
2. Add a Drip Edge and Drip Batten
After ready the roof deck we will need to install a drip edge with the batten aligning the curved top.
Before installing the drip edge, into the fascia the drip batten is installed around the roof and into the gutter system to guide drain water extend the decking.
A drip edge and drip batten system can prevent erosion around the foundation.
3. Install the Rubber Membrane
To cover the roof edge and exterior walls completely with a thick overhang we will need enough EPDM membrane. After the drip edge is installed, the rubber membranes are unrolled in the place where they will be installed.
When you applied the rubber membrane to the bonding adhesive for up to half hours it will be relaxed in a place because when it is applied it will not create any problem.
4. Apply the Finishing Touches
The finishing touches may be small on the final edges, but care to do right and they take time. Around the edge of the border, the adhesive should be applied.
By using pressure-sensitive flashing the corners you will need to be sealed. For vents to create watertight seals use flashing and another roof preventing things.
To prevent the entry of moisture from the membrane all edge is the seal by the silicon sealant. After that by trimming you can remove the extra membrane from the roof.
Full Replacement or Over Boarding of a Roof Deck
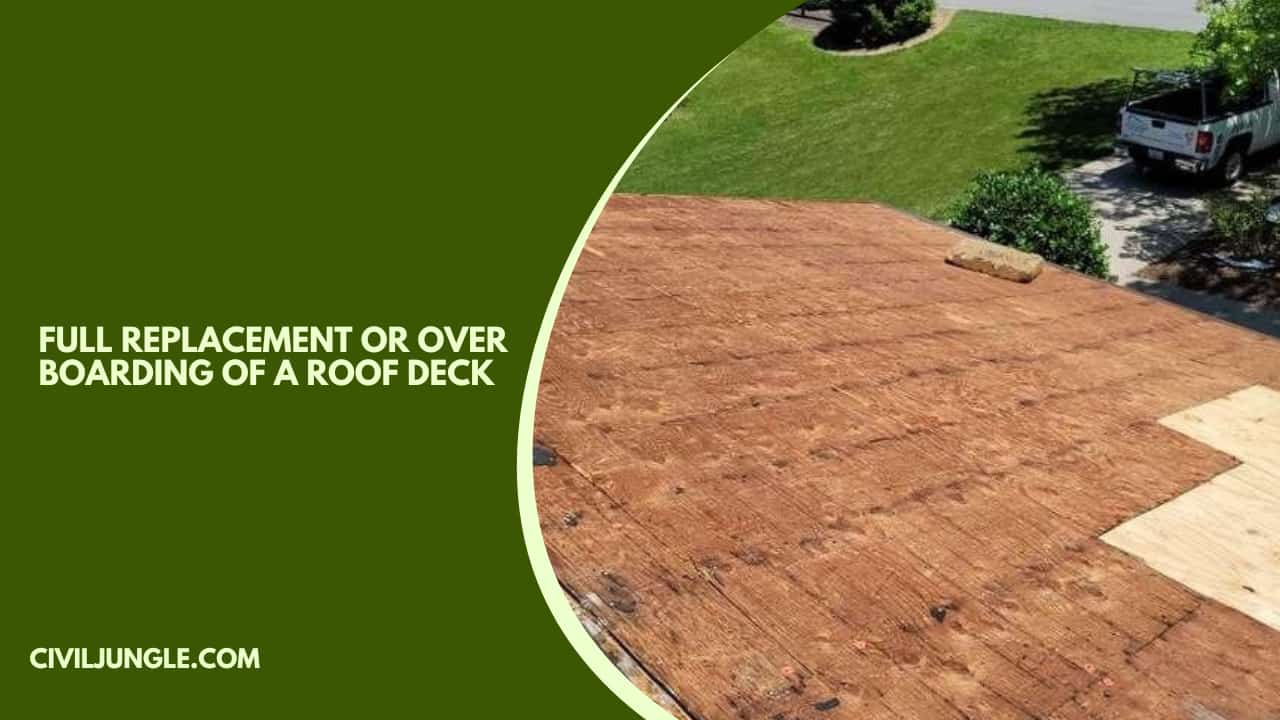
When considering installing a flat roof membrane, especially for full replacement or over-boarding of a roof deck at first, we have to choose the right contractor from the local area. After that, we have to know about the contractor, his experience and skill to improve the quality of your roof.
After choosing an experienced contractor you have to select the materials for your roof construction. For the increasing lifespan of your roof, you should be chosen quality material for the construction.
The materials are asphalt composition shingles, wood shakes, slate, metal, composition slate, and tile. After choosing and buying one material above them, we have to remove the old roof shingles from the roof. After removing the old shingles, we have to place new shingles on the place of the old roof.
If you create a wood deck then firstly you have to inspect the wood properly. After placing new roof materials drip edge is installed and the roof surface is ready.
Flat Roof Membrane Installation
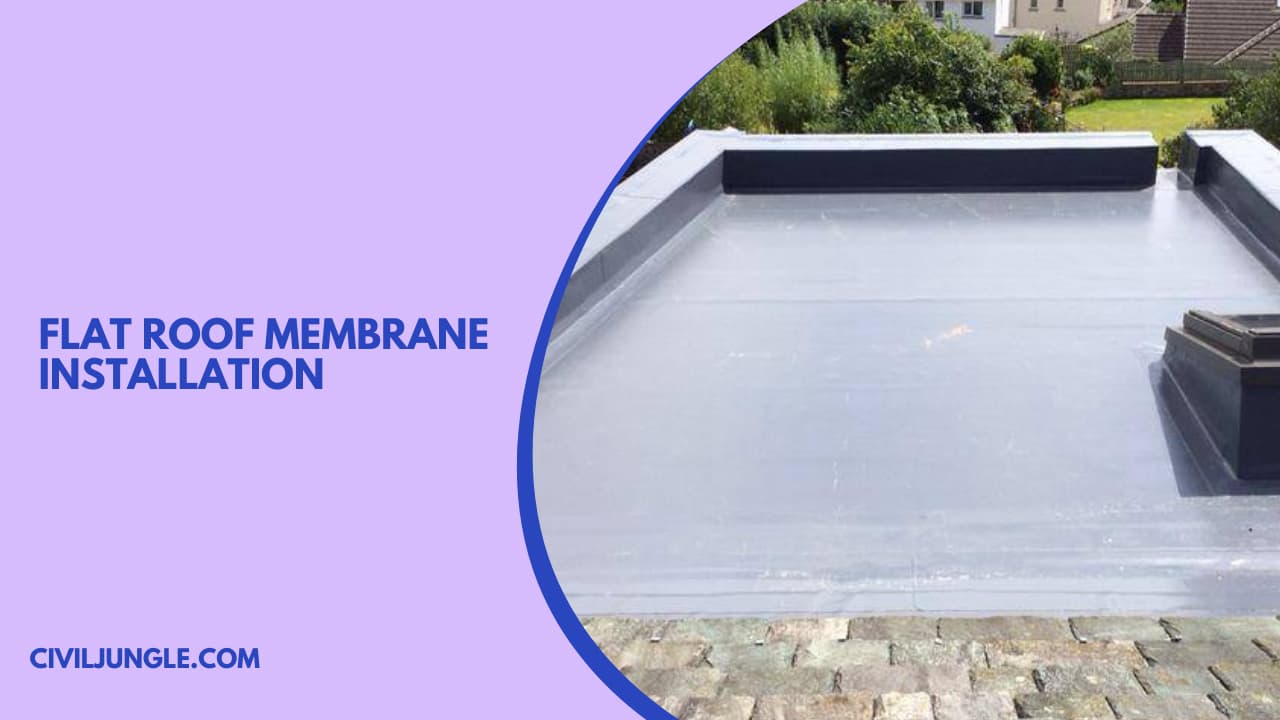
The rubber flat roof installation process, a key aspect of flat roof membrane installation, is quite simple and it is widely used nowadays.
The flat roofing membrane process is a step-by-step process that provides rubber roofing to protect your flat roof. This type of method is a “fully adhered” method where an adhesive material is used to bond together.
There are have many steeps and required experience to avoid many mistakes that cause damage to the roof. The steeps are showing below-
- Roof preparation.
- Fitting and attaching the membrane.
- Finishing up.
1. Roof Preparation
At first, we have to prepare the roof by cleaning the deck from the grime or oil and also cleaning any sharp edges of OSB board or plywood from the roof deck.
The adhesive, can lead to a problem with the moisture with a little amount, for this reason at first you should be ensuring that everything is totally dry then you can start the installation process.
2. Fitting and Attaching the Membrane
After the preparation of the roof, the membrane should be fitting and attached to the roof. To cover the roof edge and exterior walls completely with a thick overhang we will need enough membrane. After the drip edge is installed, the membranes are unrolled in the place where they will be installed.
How to Fitting EPDM Membrane?
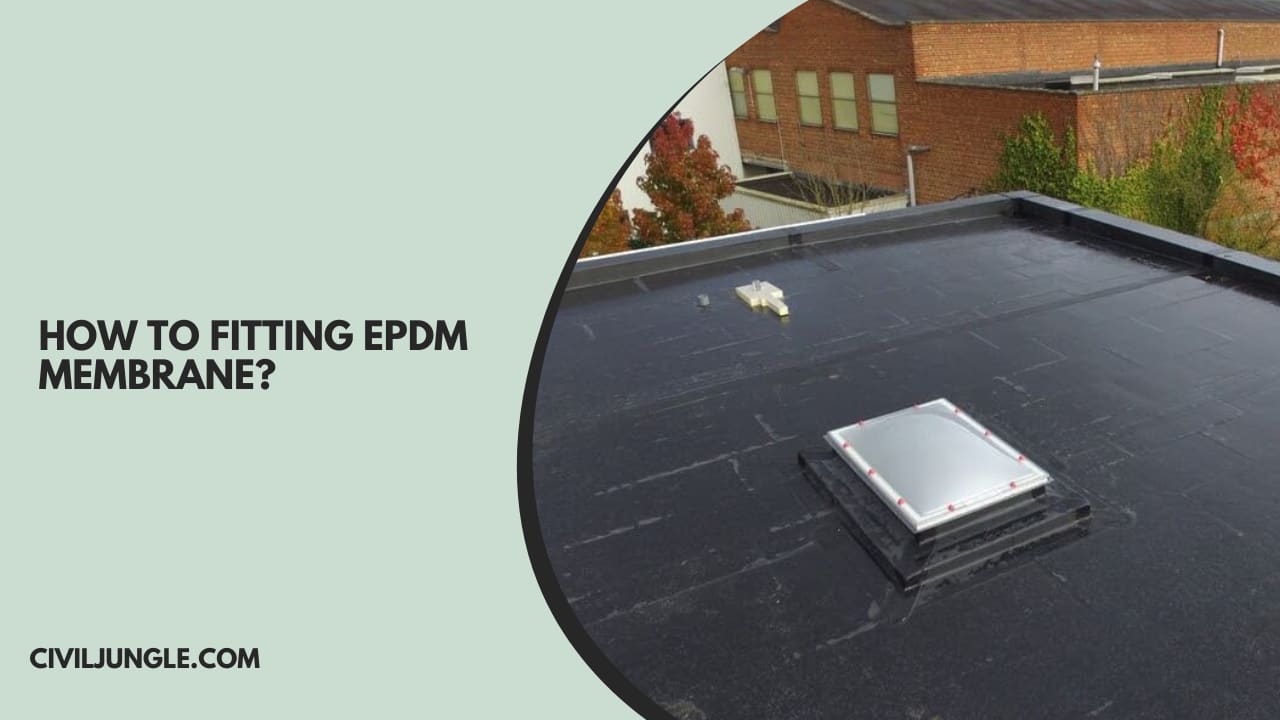
For fitting the EPDM membrane properly on the roof, it should be trimmed at the required. After that according to the required roof dimension trimmed the membrane and installed it on the roof.
Before installing the membrane on the roof, you have to ensure that the cutting part of the membrane did not cut too large or too short. In this way, you can fit the EPDM membrane on your roof.
How to Cutting EPDM Membrane?
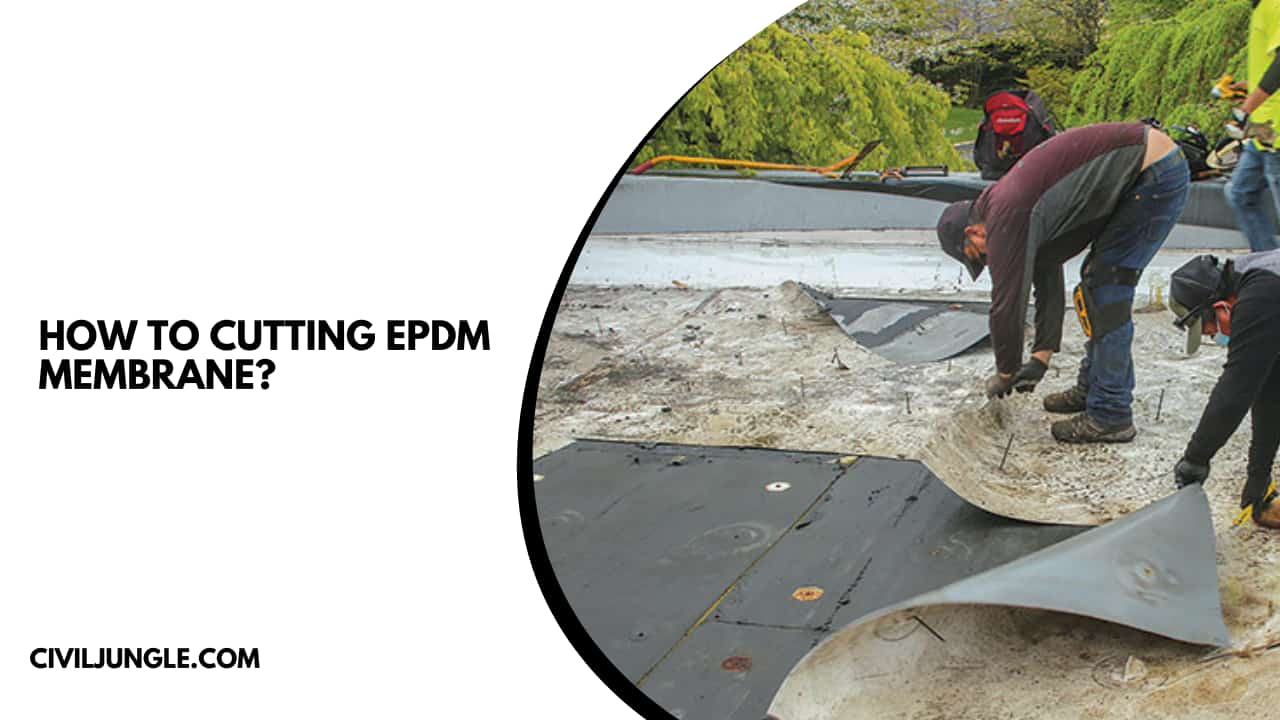
For the EPDM membrane cutting, experts are essential because it is a lightly complicated process in roofing systems.
At first, you have to measure your home roof perfectly by a contractor or an expert after finishing the complete measurement of the roof you should be cutting the EPDM membrane on the measured roof dimension.
Before installing the membrane on the roof, you have to ensure that the cutting part of the membrane did not cut too large or too short. It is a basic fundament of the cutting of EPDM membrane for your roof.
Gluing Down the EPDM Rubber
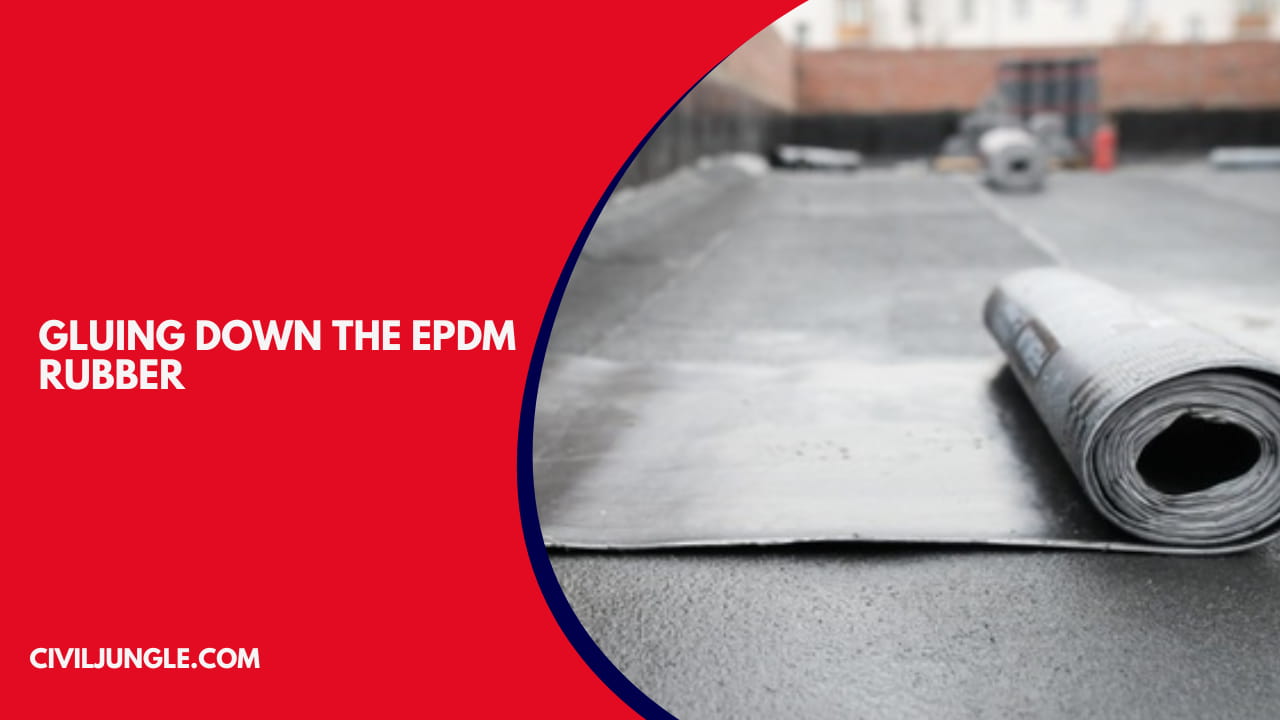
At first, we have to place the cutting pieces of EPDM rubber on the roof after placing the cutting piece of EPDM, the glue is brushed over the pieces.
After glue brush over the rubber cutting pieces, the pieces are fixed on the roof by a temporary load or a temporary clip. After 2 or 3 days when the glue is dry, the temporary load or clip is removed from the roof.
By following some steps, the EPDM rubber is glued down.
Useful Article for You
- Zero Force Members
- How Much Does a Yard of Concrete Weigh
- Cmu Wall Meaning
- Gradient Road
- Budget Sunroom Ideas
- What Is Gypsum Board
- Types of Vaulted Ceilings
- How Does Baking Soda Remove Blood from Carpet
- What Are Forms in Construction
- How Heavy Is Dirt
- Tender Meaning in Architecture
- Dark Olive Green House
- Cast in Place Concrete
- Lean to Roof
- How Tall Is an Average Door
- Grade Beam Foundation
- Window Sill Height
- Concrete Cold Joint
- Types of Traps
- Types of Pipe
- Wood Supporting Beams
- Finishing Plaster
- Home Depot Scrap Wood
- Lvl Beam Size Calculator
- Structural Shell
- Curb Types
- Msand
- Optimum Dry Meaning
- Disadvantages of Low-E Glass
- Bridge Abutment Definition
- Build Materials List
- Composite Masonry Wall
- Is Cedar a Hardwood or Softwood
- Modified Proctor Test
- Physical Properties of Sand
- Crane Machine Construction
- Types of Gable Roofs
- Door Frame Types
- How Much Does 55 Gallons of Oil Weigh
- Dog Leg Stairs
- Concrete Salt Finish
- Westpoint Bridge Builders
- Types of Porches
- Hempcrete Disadvantages
- Roof Pitch Types
- Types of Weirs
- Asphalt Floor
- Dutch Roof
- #6 Rebar Weight Per Foot
- Prizmatic Compass
- Bond Break Concrete
- Poured Concrete Wall Cost Calculator
- How Many 60 Lb Bags of Concrete in a Yard
- Wood Fence Post Spacing Chart
- Falsework
- Design of Building Structures
- Topping Slab
- Types of Cinder Blocks
- Fresh Concrete
- Door Colors for Red Brick House
- Clear Cover Concrete
- Tiles Brand
- Cement Consumption in Plaster
- Weight of Concrete Slab Calculator
- Is Clay Smaller Than Silt
- How to Calculate Dead Load
- Bad Concrete Work
- Stepped Foundations
- Residential Construction Cost Estimator Excel
- Different Construction Trucks
- Septic Pump Replacement Cost
- Dead Load Calculator
- Beam Vs Column
- Concrete Mix Ratio
- Caisson Foundation
- Glulam Beam Weight Calculator
- Bituminous Pavement
- M30 Mix Ratio
- Is 2502
- Reinforced Brick Work
- Plinth Level
- Trapezoidal Footing Formula
- Slab Steel Calculation
- Rolling Margin of Steel
- Top 20 Pvc Pipe Brands in India
- Top 5 Cement in India
- How Much Weight Can a 6×6 Support Horizontally
- Modulus of Rupture Formula
- Types of Curtains
- Building Estimate Excel Sheet
- How Is the Skeleton Similar to the Frame of a House?
- Which of the Following Best Explains Why Buildings Tip During Earthquakes?
- Rate Analysis of Civil Works
- Water Tank Company Name
- 1 Soot in Mm
- Reinforcement Lap Length Table
- Camber in Road
- Rate Analysis of Plaster
- Ply Company Name
- Boq Full Form in Tender
- Well Point
- Plastering Ratio
- Rcc Value Day
- How Many Brick in a Cube
- Dubai Construction Company
- Steel Metal Price Per Kg
- Bathroom Fittings Company
EPDM Details
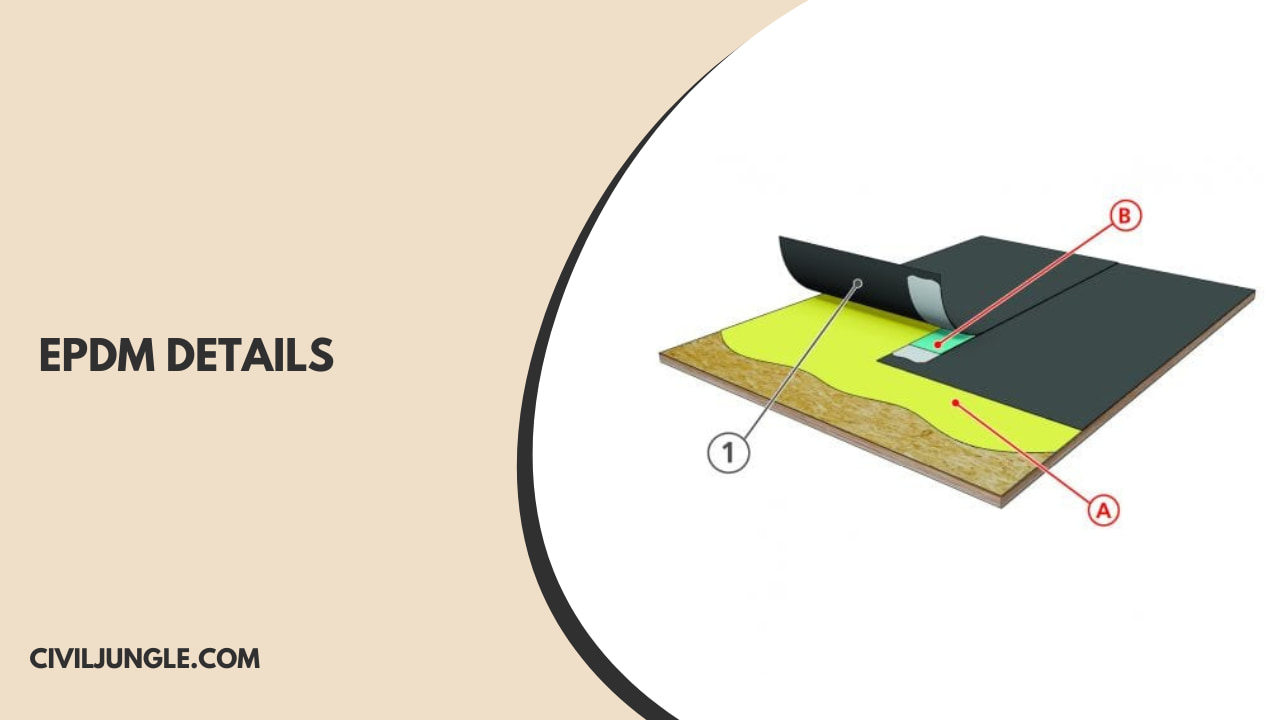
Given the rubber flat roof cost and durability, EPDM is widely used worldwide, including in the United States in roof constructions. EPDM is a roofing membrane that is manufactured with extremely durable synthetic rubber and used on low slope buildings in many countries.
The EPDM has two primary ingredients one is propylene and another is ethylene that’s are derived from natural gas and oil. The EPDM is available in markets in two colors one is white and another is black.
And also, it is available in the market in many lengths that’s start from 7.5 feet to 50 feet and there are have only two types of thickness that are 45 mm and 60 mm.
EPDM rubber roofing process is the step-by-step process that provides rubber roofing to protect your flat roof. For installed EPDM we have to follow some steps properly that’s are below.
1. Roof Preparation
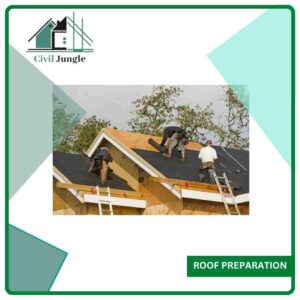
At first, we have to prepare the roof by cleaning the deck from the grime or oil and also cleaning any sharp edges of OSB board or plywood from the roof deck.
The adhesive, can lead to a problem with the moisture with a little amount, for this reason at first you should be ensuring that everything is totally dry then you can start the installation process.
2. Fitting and Attaching the Membrane
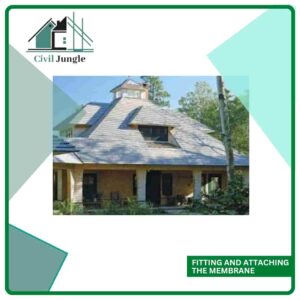
After the preparation of the roof, the membrane should be fitting and attached to the roof. To cover the roof edge and exterior walls completely with a thick overhang we will need enough membrane. After the drip edge is installed, the membranes are unrolled in a place where they will be installed.
3. Apply the Finishing Touches
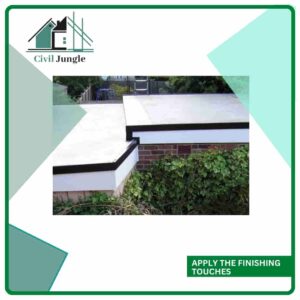
The finishing touches may be small on the final edges, but care to do right and they take time. Around the edge of the border, the adhesive should be applied.
By using pressure-sensitive flashing the corners you will need to be sealed. For vents to create watertight seals use flashing and another roof preventing things.
To prevent the entry of moisture from the membrane all edge is the seal by the silicon sealant. After that by trimming you can remove the extra membrane from the roof.
Epdm Roof Trims
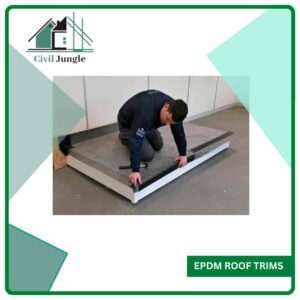
Depending on the installation of EPDM on the roof the trims are divided into four types. The types are under tiles, flat roofs, at a parapet, and up a wall, the EPDM roof trims can be done.
You measure the roof and fix the membrane on the measured roof and the extra part is trimming. After that trimming, you can remove the extra membrane from the roof.
EPDM Edge Trims
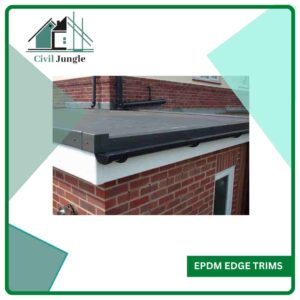
In EPDM roofing edges are totally and perfectly trimmed by flexible rubber. EPDM edge trims help the edges from wear and tear, it also resists it from ozone. Here, the edges will be curved types to do extra protection.
Epdm Drip Trims
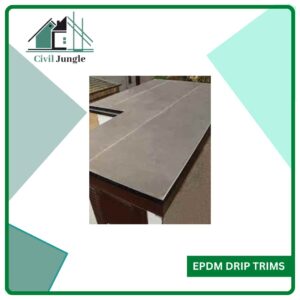
EPDM drip is a metallic or wooden bar that is fixed at the edges of the roof and the middle of the roof, At first, one series of bars is placed; then the rubber roofing is provided and finally second series of those bars is provided. Those bars are fixed with nails.
Epdm Flashing
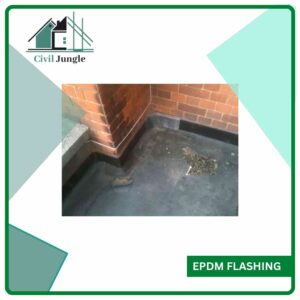
EPDM flashing is a rubber tape that is placed over the rubber roofing. It is installed to provide extra support and stability.
Can EPDM Roofing Be Installed on Any Flat Roof?
EPDM roofing can be installed on almost any flat roof and has a range of accessories to deal with details you may come across. RubberTop and shedGUARD EPDM roofing are easy to install for most competent DIYers or roofing professionals.
What Are the Benefits of EPDM Rubber Roofing?
EPDM rolls are large and lightweight, allowing them to cover more area in a shorter time for quick installation. This ultimately means a lower bottom line price for customers. While structural failures are uncommon, the design of rubber roofing makes repairs somewhat simple compared to other materials such as shingles or metal roofing.
How Long Does an EPDM Roof Last?
To install a fully functional EPDM roof that will last decades, it all comes down to the quality of the installation, and a few general inspections of the roofline once in a while to check for signs of damage and fix accordingly.
How Much Does a Full Roof Replacement Cost in the Uk?
Getting a full roof replacement will vary a great deal depending on the location and the roof type. The UK national average cost to replace a roof is £5,500 with most homeowners spending between £3,000 and £16,300. Roof installation cost ranges from £300 to £380 per square meter depending on the roof size and materials used in roofing.
What Documents Do You Need to Start a Roof Replacement Project?
Three documents are essential: 1) Most towns require a building permit for a roofing project; this can help to ensure that your contractor follows building code. Plus, your roof warranty is likely void if you don’t get the permit.
What Is the Best Glue for EPDM Rubber?
Furthermore, what is the best glue for EPDM rubber? Cyanoacrylate adhesive is practically the only choice if you are looking for a high-strength bond. Permabond recommends its 105-grade cyanoacrylate for this troublesome substrate. Subsequently, question is, will silicone stick to EPDM?
How Do You Apply Epdm Tape to Rubber?
One is to apply an adhesive designed for EPDM and the other is to use an adhesive tape made for the material. The adhesive tape, however, requires that an adhesive primer be applied to the rubber. Fortunately, the primer is applied in the same manner as the regular adhesive.
How Do You Glue Epdm Rubber Roof Panels?
Rolled out in strips over the rooftop, each strip is overlapped and glued together to create one bonded surface. There are two ways to glue EPDM rubber. One is to apply an adhesive designed for EPDM and the other is to use an adhesive tape made for the material.
What Is EPDM Membrane Waterproofing?
It is a single product that can be used for waterproofing most parts of a building. The EPDM Membrane Waterproofing are techno-commercially much better than substitutes such as bitumen membranes, crystalline products, admixtures, various coatings, etc.
Where Do You Find Epdm in Everyday Life?
EPDM can be found in parts such as water system O-rings, hoses, and gaskets, as well as in electrical insulators and connectors for wire and cable. It also takes the form of accumulator’s bladders, diaphragms, grommets, and belts.
How Is Epdm Roofing Installed?
Fellows steps for EPDM Roofing install.
Step 1. Roof Deck Preparation
Step 2. Install Drip Batten
Step 3. Install Drip Back Drip Trim
Step 4. Chase out Wall Upstand
Step 5. Relax Rubber Membrane
Step 6. Fold Membrane Halfway
Step 7. Apply Deck Adhesive
Step 8. Sweep EPDM Membrane
Step 9. Apply Contact Adhesive to Roof Perimeter
Step 10. Ensure Contact Adhesive is Touch Dry
Step 11. Penny Roller Detail
Step 12. Folding the Rubber Membrane on a Roof Corner
Step 13. Form Pigs Ear
Step 14. Fold Pigs Ear
Step 15. Fit Trim Corner
Step 16. Fit Plastic trim Kerb Edge
Step 17. Fit Trim Joining Clip
Step 18. Fit plastic trim Drip or Gutter Trim
Step 19. Trim Excess Rubber Membrane
Step 20. Completed Rubber Roof
How to Apply EPDM Roofing?
Here, Applying EPDM Roofing are as follows.
- Prepare the Roof Deck.
- Add a Drip Edge and Drip Batten.
- Install the Rubber Membrane.
- Apply the Finishing Touches.
What Does EPDM Stand for?
EPDM stands for ethylene propylene diene monomer, which is a bit of a mouthful, so it’s commonly shortened to EPDM.
Like this post? Share it with your friends!
Suggested Read –
- Specific Gravity Test of Bitumen | Procedure of Specific Gravity Test of Bitumen | Result of Specific Gravity Test of Bitumen
- Difference Between Flexible Pavement and Rigid Pavement | What is Pavement | Types of Pavement
- What Are Columns | Types of Rcc Column | Round Column Vs Square Column | Pillar Vs Column
- What Are Construction Cost Estimates | Types of Construction Cost Estimates | Purpose of Preparing a Cost Estimate
- Shotcrete Vs Gunite | What Is Gunite | Advantage & Disadvantage of Guniting Process | What Is Shotcrete | Advantage & Disadvantage of Shotcreting
Leave a Reply